Difference between revisions of "Getting started"
(→How do I get started?) |
(→How do I get started?) |
||
| Line 1: | Line 1: | ||
| − | + | [[File:USB-C.png|thumb]] | |
| − | + | [[File:Ethernet.png|thumb]] | |
| − | + | [[File:Blink.png|thumb]] | |
| − | + | [[File:Http.png|thumb]] | |
| − | + | ||
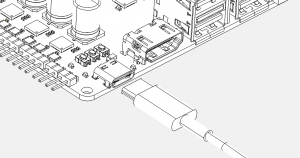
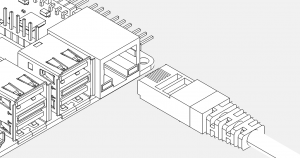
| − | + | It can be a good idea to test the board on the bench before installing it in the printer. Use the USB-C connector or the 24V power plug to power the board and connect the ethernet cable between the board and your local network. | |
| − | + | ||
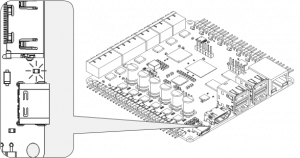
| + | Once power is applied, you should see a white LED light up in the middle of the board. After a few seconds, there should be activity on the eMMC LED, the CPU LED and on the heartbeat LED. | ||
| + | |||
| + | Once the board is powered up, use a computer to access the web interface provided by OctoPrint/MainSail/Fluidd (the UI). | ||
| + | In order to get access the UI, a network cable must be connected to the board and to a network switch. It is also possible to use a wifi dongle. | ||
| + | If a network cable is used, the board should respond to the address: | ||
| + | http://recore.local | ||
| + | |||
| + | For OctoPrint, once the interface is visible, run through the wizard to set up a new printer. | ||
| + | After the wizard is done, go to the Klipper tab in OctoPrint and edit the Klipper config file. | ||
| + | This is where the bulk of the work will happen. | ||
| + | |||
| + | On the MainSail or Fluidd image, there should not need to be any configuration necessary. Verify that the web interface comes up and that Klipper is running as expected. | ||
Revision as of 10:11, 15 May 2024
It can be a good idea to test the board on the bench before installing it in the printer. Use the USB-C connector or the 24V power plug to power the board and connect the ethernet cable between the board and your local network.
Once power is applied, you should see a white LED light up in the middle of the board. After a few seconds, there should be activity on the eMMC LED, the CPU LED and on the heartbeat LED.
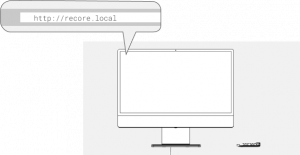
Once the board is powered up, use a computer to access the web interface provided by OctoPrint/MainSail/Fluidd (the UI). In order to get access the UI, a network cable must be connected to the board and to a network switch. It is also possible to use a wifi dongle. If a network cable is used, the board should respond to the address: http://recore.local
For OctoPrint, once the interface is visible, run through the wizard to set up a new printer. After the wizard is done, go to the Klipper tab in OctoPrint and edit the Klipper config file. This is where the bulk of the work will happen.
On the MainSail or Fluidd image, there should not need to be any configuration necessary. Verify that the web interface comes up and that Klipper is running as expected.


