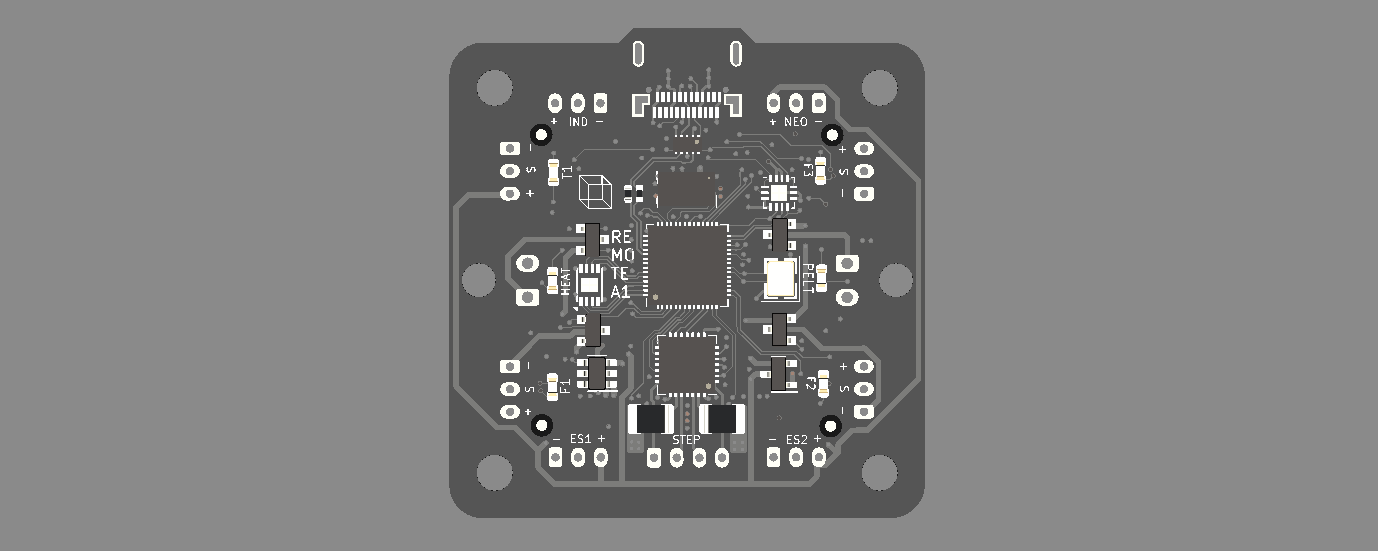
Remote A1
From iagent
[mcu remote]
serial: /dev/serial/by-id/usb-Klipper_rp2040_E661AC8863905924-if00

[static_digital_output remote_led]
pins: remote:gpio2

[output_pin fan_r_1]
pin: remote:gpio1

[output_pin fan_r_2]
pin: remote:gpio12

[output_pin fan_r_3]
pin: remote:gpio21

[tmc2209 extruder3]
uart_pin: remote:gpio7
uart_address: 0
run_current: 0.500
hold_current: 0.500
sense_resistor: 0.1
stealthchop_threshold: 250

#endstop_pin: remote:gpio4
#enable_pin: !remote:gpio10
#rotation_distance: 40
#microsteps: 16
#position_endstop: 0
#position_max: 200
#homing_speed: 20.0

[extruder3]
step_pin: remote:gpio6
dir_pin: remote:gpio5
heater_pin: remote:gpio0
sensor_type: EPCOS 100K B57560G104F
sensor_pin: remote:gpio28
rotation_distance: 40
microsteps: 16
nozzle_diameter: 0.400
filament_diameter: 1.75
control: pid
pid_Kp: 22.2
pid_Ki: 1.08
pid_Kd: 114
min_extrude_temp: 30
min_temp: -272
max_temp: 300

[verify_heater extruder3]
check_gain_time: 2400

[adc_temperature remote_fan_current_0]
temperature1: 0
voltage1: 0
temperature2: 33
voltage2: 3.3

[temperature_sensor remote_fan_current_0]
adc_voltage: 3.3
sensor_pin: remote:gpio29
sensor_type: remote_fan_current_0
max_temp: 2.0
gcode_id: RemoteFanCurrent0

[adxl345]
cs_pin: remote:gpio25
spi_bus: spi1c

[resonance_tester]
accel_chip: adxl345
probe_points:
    100, 100, 20  # an example

[probe]
pin: remote:gpio22
#--------------------------------------------------------------------
x_offset: 0
y_offset: 25.0
z_offset: 0
speed: 10.0
samples: 3
samples_result: median
sample_retract_dist: 3.0
samples_tolerance: 0.01
samples_tolerance_retries: 3

# Set this high to use GPIO20 as high frequency input
[static_digital_output Relit_direction]
pins: !remote:gpio19

[neopixel relit]
pin: remote:gpio20
chain_count: 12


[fan peltier]
pin: remote:gpio3
max_power: 0.1
cycle_time: 0.00001 #0.01
hardware_pwm: True
Klipper firmware compilation
The unit comes with firmware pre-installed. If you want to upgrade the firmware, these are the steps to reproduce. This can be done directly from Recore, or from a regular computer. If the device ID doesn't match, the board is not in DFU mode, and needs to be manually started that way. Use a paperclip or some wire, unplug the USB of the device, short the two round pads on the back of the PCB and plug in the USB. At that point the RP2040 will be in DFU mode, allowing it to be flashed.
cd /home/debian/klipper
cp test/configs/rp2040.config .config
make olddefconfig
make -j
make flash FLASH_DEVICE="2e8a:0003"
After that, the board should be visible as OpenMoko, Inc. rp2040
cd /home/debian/klipper/scripts


