Difference between revisions of "Reflash"
From iagent
| (9 intermediate revisions by the same user not shown) | |||
| Line 4: | Line 4: | ||
Reflash is a Linux image for downloading and installing [[Refactor]] images on [[Recore]]. You can also create an image from the contents of the eMMC. | Reflash is a Linux image for downloading and installing [[Refactor]] images on [[Recore]]. You can also create an image from the contents of the eMMC. | ||
| + | |||
| + | This page is for Reflash v0.1.2 which is the latest '''stable''' version of Reflash. | ||
| + | If you want to try the next version, take a look at <br> | ||
| + | [[Reflash_1.0.0]] | ||
| + | |||
This page has step-by-step instructions for using the image. Here is what you should do: | This page has step-by-step instructions for using the image. Here is what you should do: | ||
| − | + | <ol> | |
| − | + | <li> | |
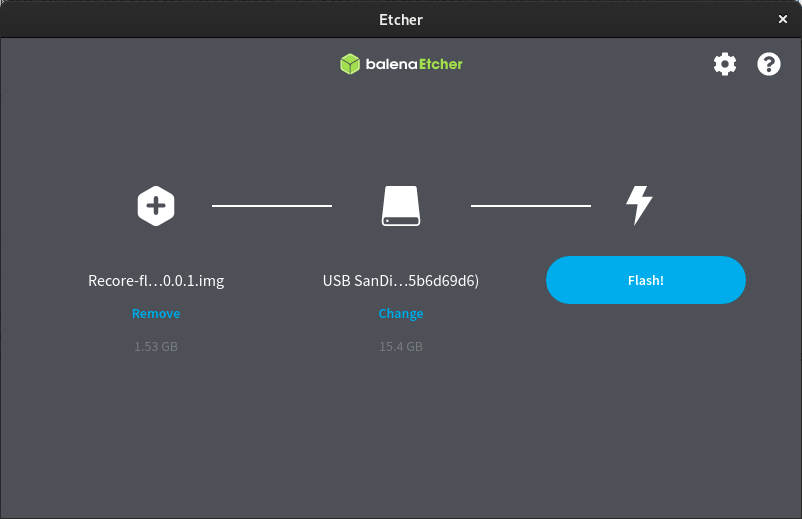
| − | + | Use [https://www.balena.io/etcher/ Balena Etcher] to download and flash the Reflash image. Here is the URL to the image: <pre>https://github.com/intelligent-agent/Reflash/releases/download/v0.1.2/Reflash-v0.1.2.img.xz</pre><div class="res-img">[[File:BalenaEthcer.png|center]]</div> | |
| − | + | </li> | |
| − | + | <li> | |
| − | + | After flashing the image to a USB drive with at least 4 GB of storage, eject the USB drive <b>properly</b> and insert it in a USB port on the Recore board. | |
| − | + | </li> | |
| + | <li> | ||
| + | Now you need to change boot medium from eMMC to USB on the Recore board. This can be done through SSH by logging in to the board and writing from the command line:<pre>sudo set-boot-media usb</pre> And then<pre>sudo reboot</pre> Alternatively, if the the previous version of Refactor was with OctoPrint, you can change boot media from the Refactor-tab in the OctoPrint user interface and then rebooting the board. From version v.3.1.0-RC1 there is also a button to set the boot media to USB in Mainsail. <div class="res-img">[[File:Set-boot-media-both.png]]</div> | ||
| + | </li> | ||
| + | |||
| + | <div class="alert alert-warning"> | ||
| + | ===='''Note'''==== | ||
| + | Depending on the size and speed of the USB drive, it can take a while to boot the first time. The file system is automatically expanded and this can be time consuming. </div> | ||
| + | <li> | ||
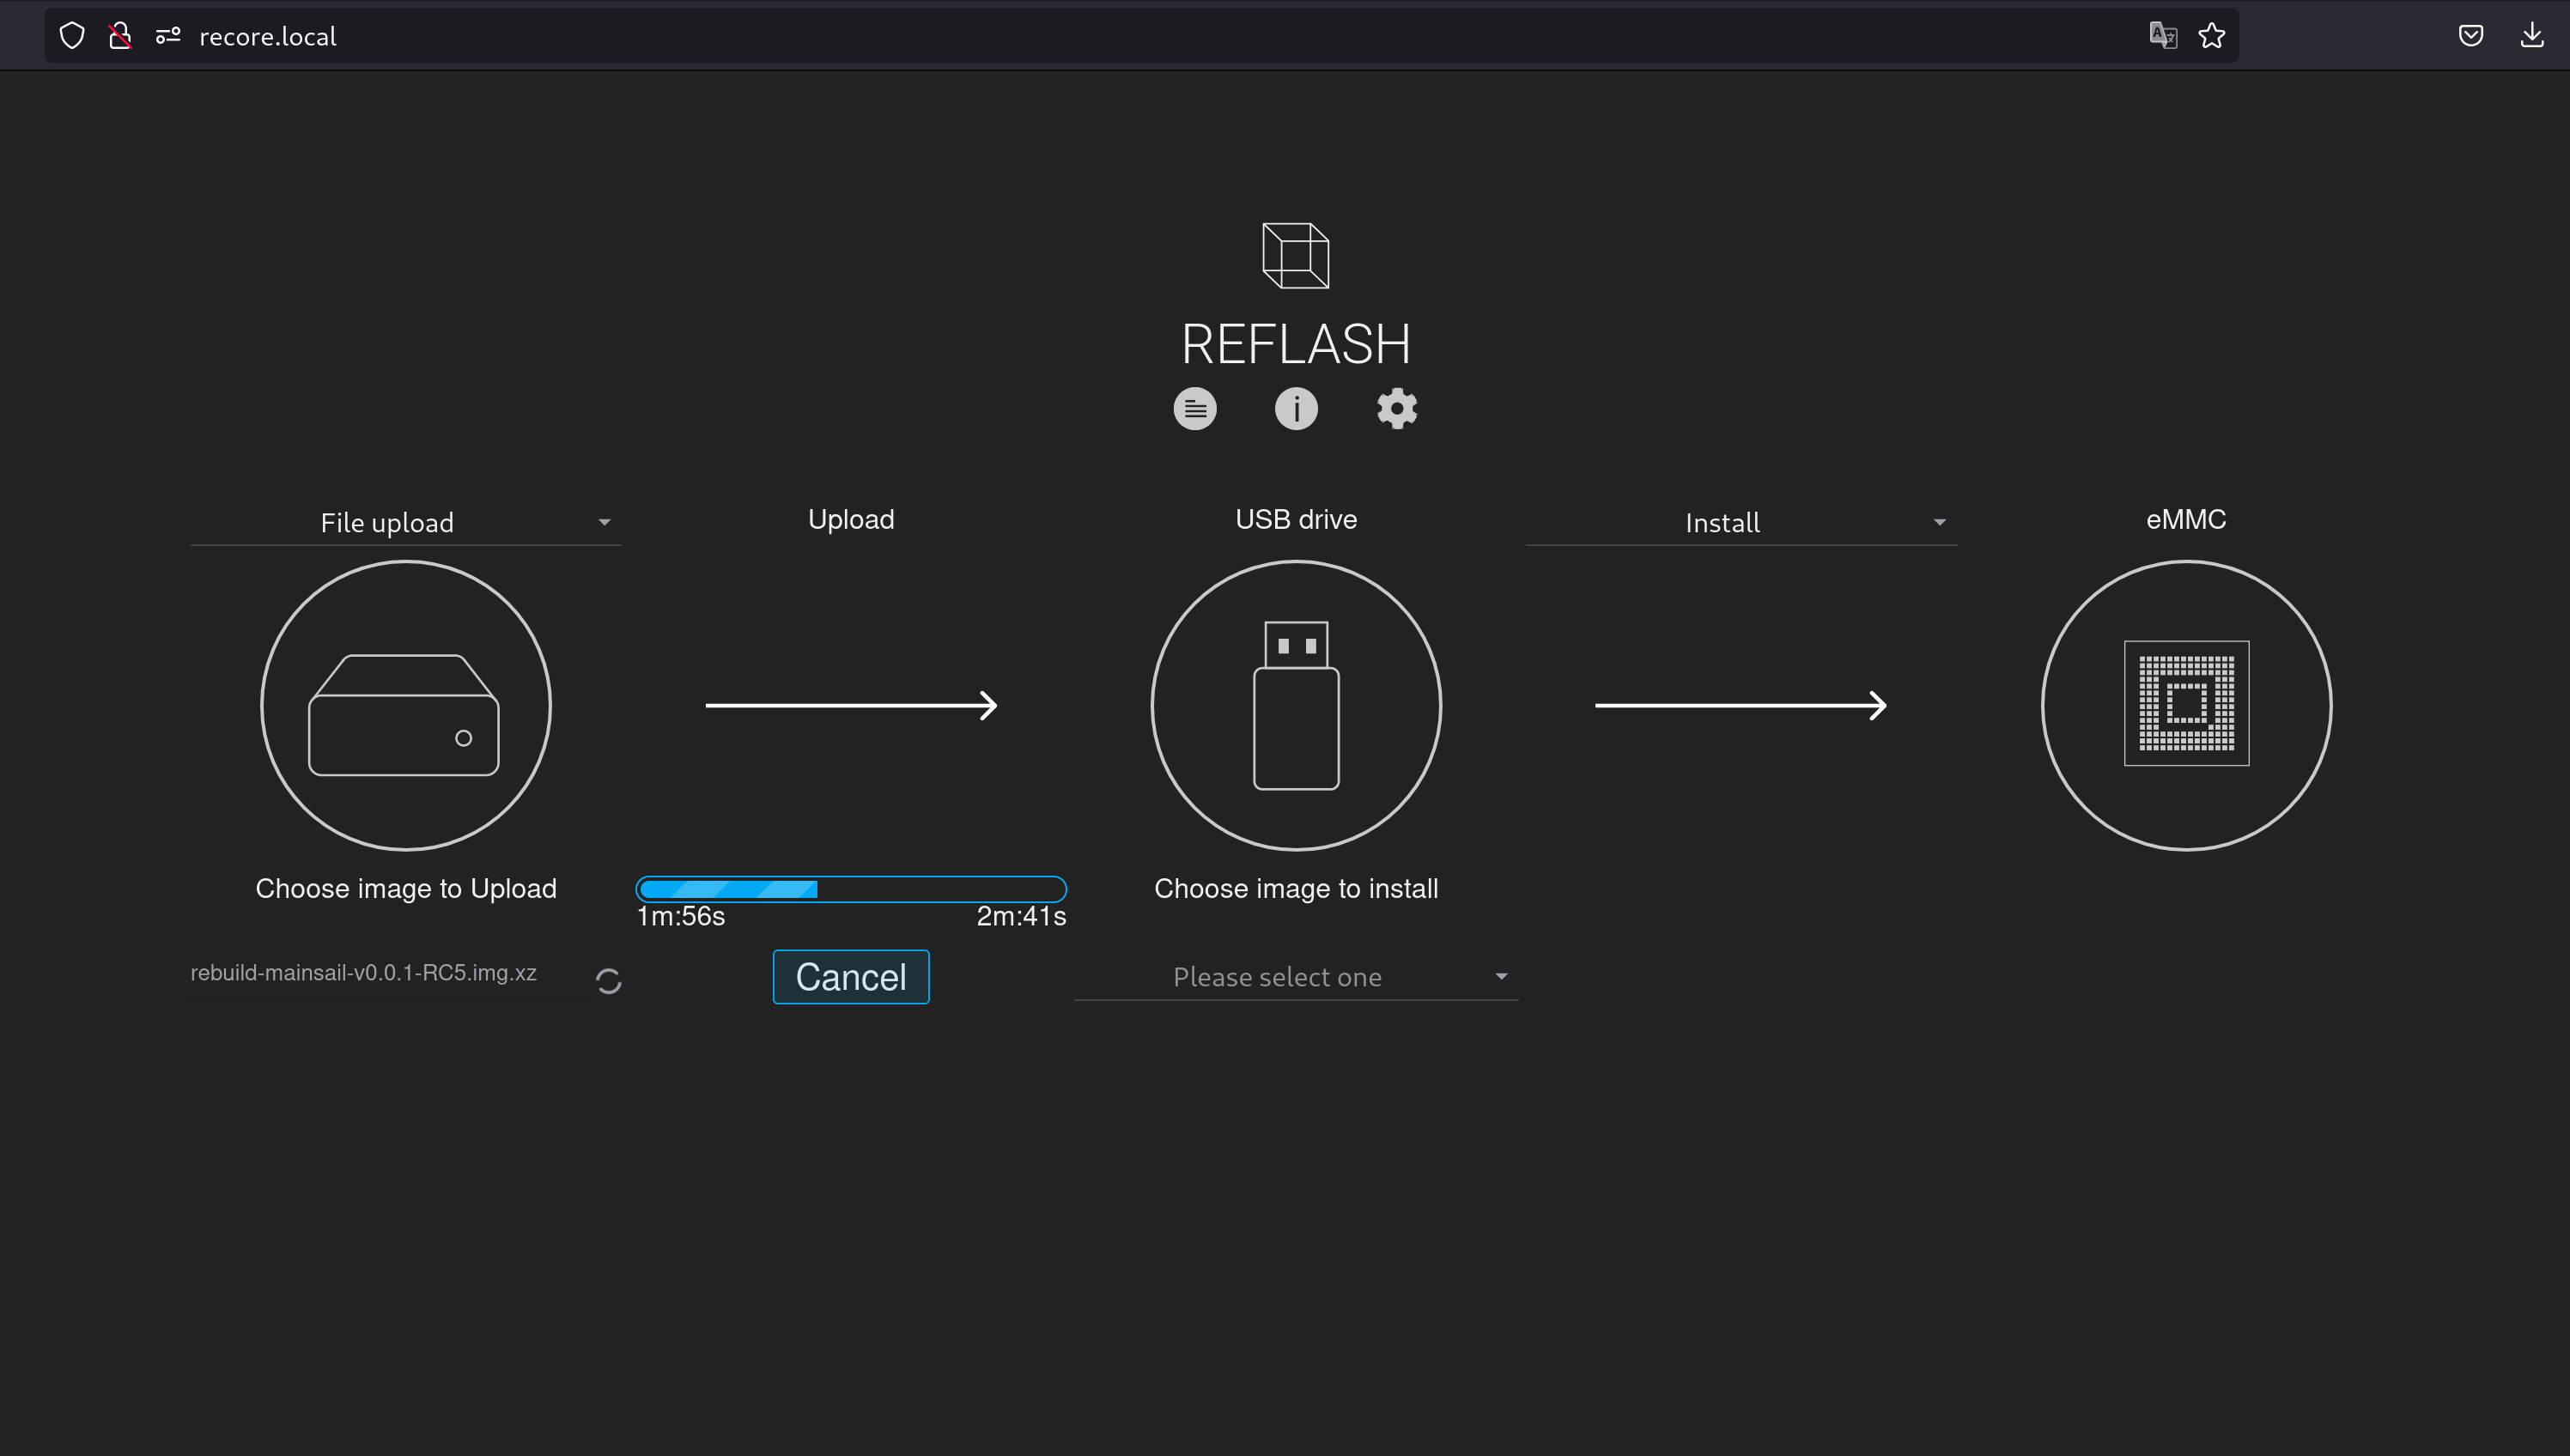
| + | Once the board has booted from USB, you should be able to access the web interface using the address http://recore.local<div class="res-img">[[File:Reflash.png|center]]</div> | ||
| + | </li> | ||
| + | <li> | ||
| + | From the web interface, choose witch version of Refactor you want to download. There are two types of images, either with OctoPrint as the web interface or with Mainsail as the web interface. You should always choose the latest version of Refactor. | ||
| + | </li> | ||
| + | <li> | ||
| + | Once the image has been downloaded (to the USB drive) you can install/flash the image to the eMMC. This will take 5-10 minutes. | ||
| + | </li> | ||
| + | <li>Once the image has been flashed on the eMMC drive, you can reboot the board, and it will boot using the Refactor image that you chose. | ||
| + | </li> | ||
| + | </ol> | ||
You can keep the Reflash USB drive in a safe place, or even keep it mounted in the printer. If you want to upgrade to a later version of Refactor, the same image can be used again. | You can keep the Reflash USB drive in a safe place, or even keep it mounted in the printer. If you want to upgrade to a later version of Refactor, the same image can be used again. | ||
<div class="alert alert-warning"> | <div class="alert alert-warning"> | ||
===='''Note'''==== | ===='''Note'''==== | ||
| − | It is possible to log in to the Reflash image for manual operations. The SSH access is available using username '''root''' and password ''' | + | It is possible to log in to the Reflash image for manual operations. The SSH access is available using username '''root''' and password '''temppwd''' |
</div> | </div> | ||
Latest revision as of 14:35, 23 March 2024

Reflash is a Linux image for downloading and installing Refactor images on Recore. You can also create an image from the contents of the eMMC.
This page is for Reflash v0.1.2 which is the latest stable version of Reflash.
If you want to try the next version, take a look at
Reflash_1.0.0
This page has step-by-step instructions for using the image. Here is what you should do:
-
Use Balena Etcher to download and flash the Reflash image. Here is the URL to the image:
https://github.com/intelligent-agent/Reflash/releases/download/v0.1.2/Reflash-v0.1.2.img.xz
- After flashing the image to a USB drive with at least 4 GB of storage, eject the USB drive properly and insert it in a USB port on the Recore board.
-
Now you need to change boot medium from eMMC to USB on the Recore board. This can be done through SSH by logging in to the board and writing from the command line:
sudo set-boot-media usb
And thensudo reboot
Alternatively, if the the previous version of Refactor was with OctoPrint, you can change boot media from the Refactor-tab in the OctoPrint user interface and then rebooting the board. From version v.3.1.0-RC1 there is also a button to set the boot media to USB in Mainsail.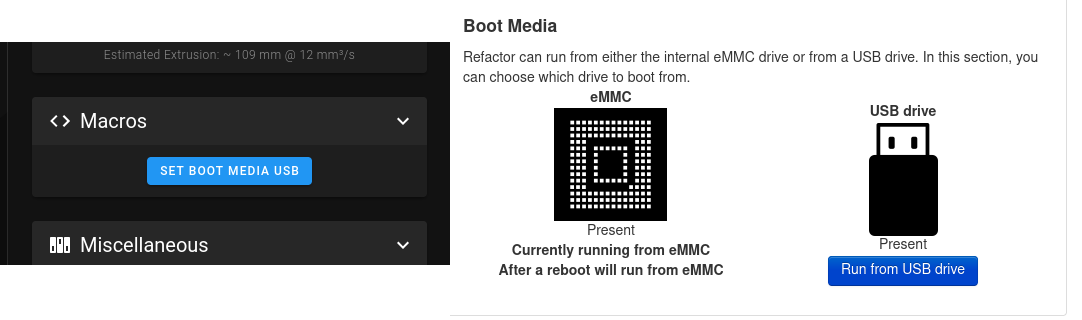
-
Once the board has booted from USB, you should be able to access the web interface using the address http://recore.local
- From the web interface, choose witch version of Refactor you want to download. There are two types of images, either with OctoPrint as the web interface or with Mainsail as the web interface. You should always choose the latest version of Refactor.
- Once the image has been downloaded (to the USB drive) you can install/flash the image to the eMMC. This will take 5-10 minutes.
- Once the image has been flashed on the eMMC drive, you can reboot the board, and it will boot using the Refactor image that you chose.


Note
Depending on the size and speed of the USB drive, it can take a while to boot the first time. The file system is automatically expanded and this can be time consuming.
You can keep the Reflash USB drive in a safe place, or even keep it mounted in the printer. If you want to upgrade to a later version of Refactor, the same image can be used again.
Note
It is possible to log in to the Reflash image for manual operations. The SSH access is available using username root and password temppwd